
Some of the links in this post are affiliate links.

If you are looking to part ways with third-party apps like Linkinbio and Linktree, this post is for you. Creating a landing page for my links was the best decision I made this year and in this post, I’ll be showing you how to do it yourself.
One of the main reasons I decided to make this change is because I noticed every time someone would click the link in my IG/Twitter bio, they wouldn’t register on my Google analytics. Instead, they showed up on Linktree.
As a creative who works with brands I rely on my analytics, specifically Google Analytics, to provide brands. Since making the change, my page views have increased drastically.
This tutorial is for WordPress.org uses only. Here are some useful tutorials if you use another platform for your site.
Pros
- All your analytics can be found on one page. Even if people don’t click on an individual link, you receive page views by clicking the link in your bio.
- Looks more professional & cleaner. I don’t know about you, but I much prefer having my own domain in my bio.
- You have full creative control.
Cons
- Not mobile-friendly. There’s only one issue with this method. As the editor, when you want to add new buttons, you have to do so on a desktop. The drag and drop option doesn’t allow you to create buttons seamlessly. I work around this by using an existing button and changing the title and link.
Here’s How to Create Your Landing Page
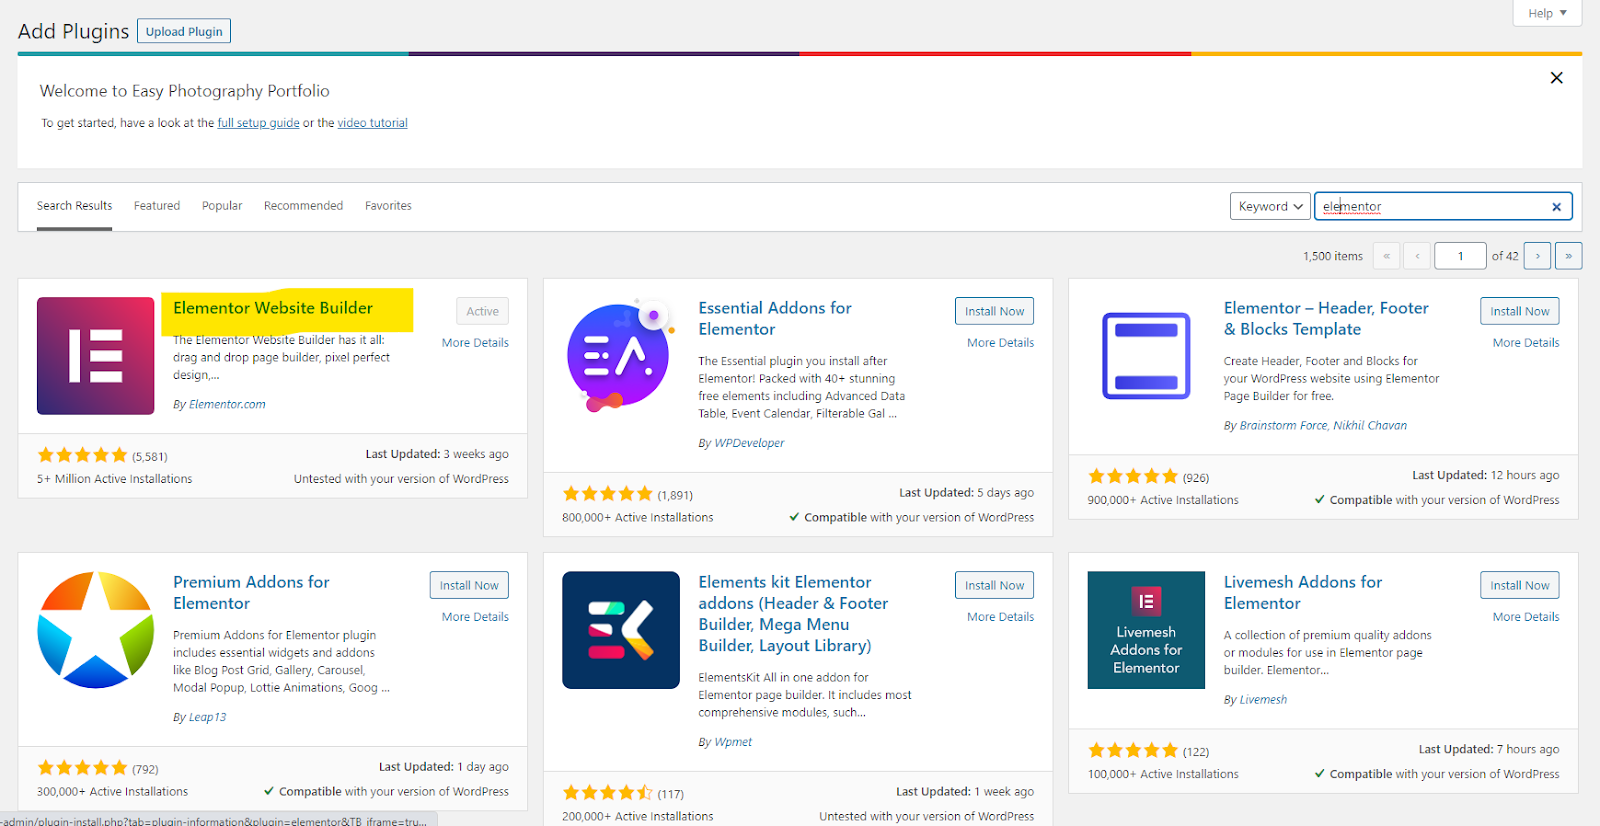
- Download the Elementor Plugin
- On your WordPress dashboard, go to – Plugins, Add New, Search Elementor, click Install Now and Activate.
- Create a new page
- On your WordPress dashboard, go to – Pages, Add New
- On the right-hand side of your page, under permalink, type in the URL you wish to appear. EX: www.bellarosablog.com/links
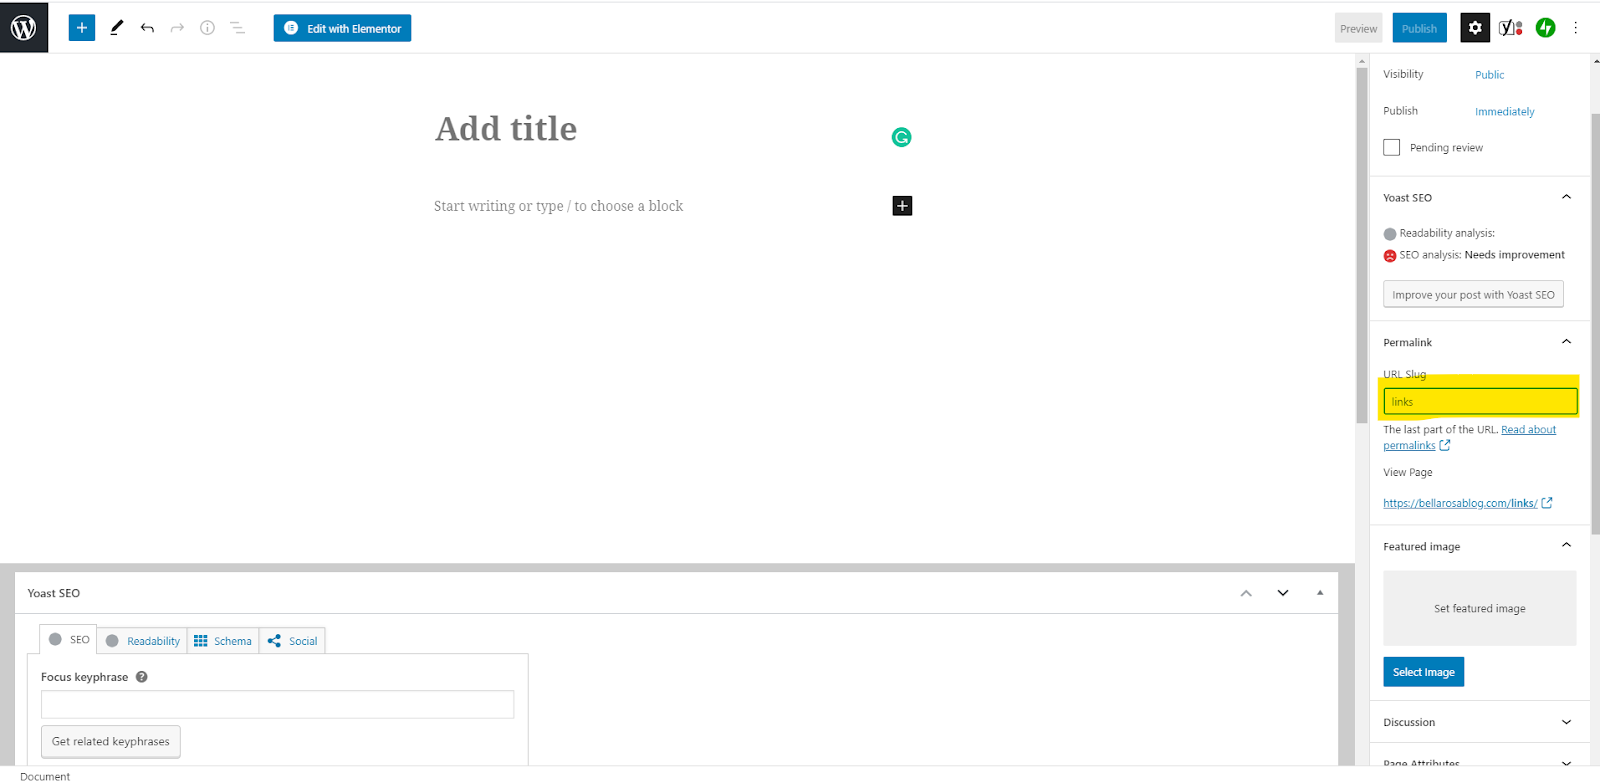
– Click Edit with Elementor

- Designing your page
- If you want your link page to resemble the format of your blog with the same header and footer, you can keep the default setting.
** I like to limit clutter on my link page and want it to look similar to my old Linktree page
- To change the default setting, click the setting (pictured below), Page Layout – Elementor Canvas. You should end up with a blank white page.


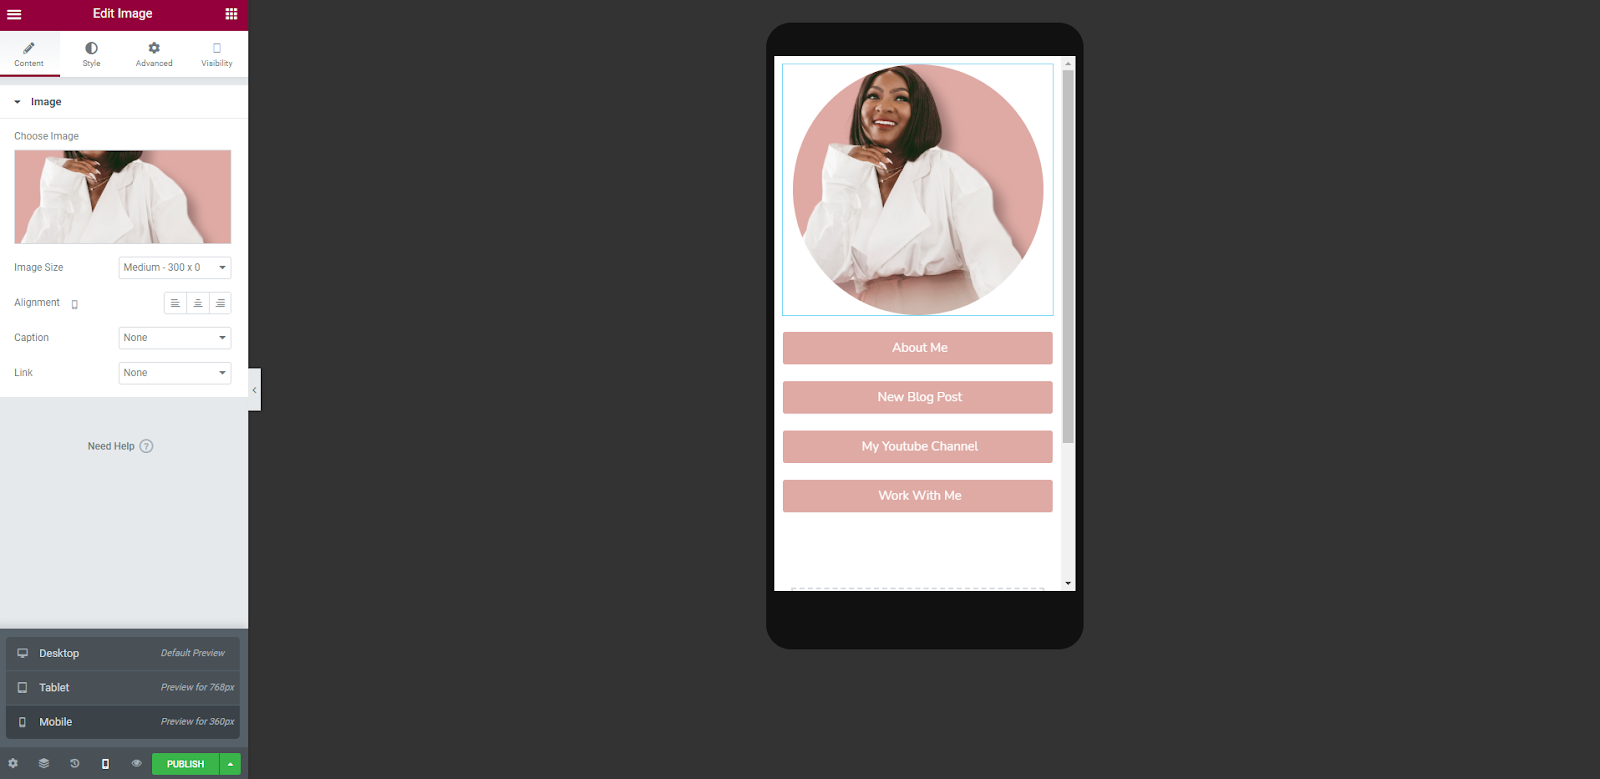
- Click this icon to access all the widgets
- I add an image at the top, by dragging the image widget to the page. Upload your image and that part is done.
- You can either upload an image with a round format or go-to style, border-radius, and adjust the borders.
** Since my image was larger, I had to adjust my image size and play around with the radius.

- Adding your links
- Go back to widgets and drag the button widget to your page
- Here you can add your link, edit the text to be shown & customize the font, background color, and everything.
- VERY IMPORTANT! Under content, go-to alignment, and click justified. This will ensure all your buttons are the exact same size.
- To save time, right-click on the button and click duplicate and edit the links and titles.

- If you want to preview the page for Mobile and Tablet. Click the laptop icon at the bottom and preview in your preferred format.
Finally, you can play around with the widgets and add as many features as you’d like without paying for the Pro-version.
- Hit Published
You’re done, you did it! You’ve created your very own customized link page.
BONUS!!!!
If you’d like to schedule a link to go live at a certain time on a certain day, download the plugin “Dynamic Visibility for Elementor”. The function will automatically appear on your Elementor pages and gives you the option to schedule when a link goes live and when it should be removed.
If this tutorial helped you in any way, please share with someone and pin the image below on Pinterest! Also, leave a comment let me know if it helped.
For more creator tips and tricks, check out this page.


Love this! Going to try it out. I already use elementorbfor my websites at http://www.kelishamills.com and http://www.ultimatemompreneur.com
Hi, Maria!! Thank you so, so much for taking the time to create this easy-to-follow tutorial. I had the pleasure of deleting by TWO Linktree accounts yesterday, and it felt so good to have a professional-looking landing page. All the best in 2021! <3, Jayme
Saw you comment this post in the Bossfluence fb group! Thank you for sharing. Very helpful!
Thank you so much hun for sharing this!! You are literally the goat at this, I would gladly pay for an e-book from you. Everything was so helpful, I was able to create mine!
Thank you for sharing these tips Maria. I just followed the steps to set up the landing page. I appreciate it so much.